Setup Ubuntu 20.04
Ikuti langkah-langkah berikut untuk melakukan installasi pada Ubuntu Server 20.04.
Perlu Diperhatikan!
Perintah-perintah berikut secara default digunakan untuk Ubuntu 20.04, harap perhatikan notes untuk mengetahui perintah pada Ubuntu dengan versi yang berbeda.
Penyesuaian Timezone
Cek terlebih dahulu timezone saat ini menggunakan perintah ini.
timedatectl
               Local time: Wed 2021-10-20 09:26:43 UTC
           Universal time: Wed 2021-10-20 09:26:43 UTC
                 RTC time: Wed 2021-10-20 09:26:44
                Time zone: Etc/UTC (UTC, +0000)
System clock synchronized: yes
              NTP service: active
          RTC in local TZ: no
Sebelum mengganti timezone cek dulu ketersediaan timezone, menggunakan perintah berikut.
timedatectl list-timezones | grep "Asia/NAMA_TIMEZONE"
Notes
Ganti kata NAMA_TIMEZONE pada perintah diatas dengan timezone yang akan dicari.
Berikut beberapa timezone yang sering digunakan:
Asia/Jakarta(WIB)Asia/Makassar(WITA)Asia/Jayapura(WIT)
Untuk mengubah timezone gunakan perintah berikut.
sudo timedatectl set-timezone TIMEZONE_YANG_DIPILIH
Ganti kata TIMEZONE_YANG_DIPILIH dengan timezone yang akan digunakan sesuai posisi Head Office client. Misal Head Office client ada di Bali, maka pilih timezone Asia/Makassar.
sudo timedatectl set-timezone Asia/Makassar
Beberapa timzone lain yang sering digunakan:
sudo timedatectl set-timezone Asia/Jakarta
sudo timedatectl set-timezone Asia/Jayapura
Setelah berhasil mengubah timezone, cek kembali timezone server menggunakan perintah berikut.
timedatectl
               Local time: Wed 2021-10-20 17:45:25 WITA
           Universal time: Wed 2021-10-20 09:45:25 UTC
                 RTC time: Wed 2021-10-20 09:45:26
                Time zone: Asia/Makassar (WITA, +0800)
System clock synchronized: yes
              NTP service: active
          RTC in local TZ: no
Install Apache
Update terlebih dahulu package index:
sudo apt update
Kemudian install apache
sudo apt install -y apache2
Check Web Server
Cek server sudah berjalan atau belum
sudo systemctl status apache2
Output seharusnya kurang lebih seperti berikut
● apache2.service - The Apache HTTP Server
     Loaded: loaded (/lib/systemd/system/apache2.service; enabled; vendor preset: enabled)
     Active: active (running) since Thu 2020-04-23 22:36:30 UTC; 20h ago
       Docs: https://httpd.apache.org/docs/2.4/
   Main PID: 29435 (apache2)
      Tasks: 55 (limit: 1137)
     Memory: 8.0M
     CGroup: /system.slice/apache2.service
             ├─29435 /usr/sbin/apache2 -k start
             ├─29437 /usr/sbin/apache2 -k start
             └─29438 /usr/sbin/apache2 -k start
Cek juga di browser dengan mengakses alamat IP server
http://ip_server
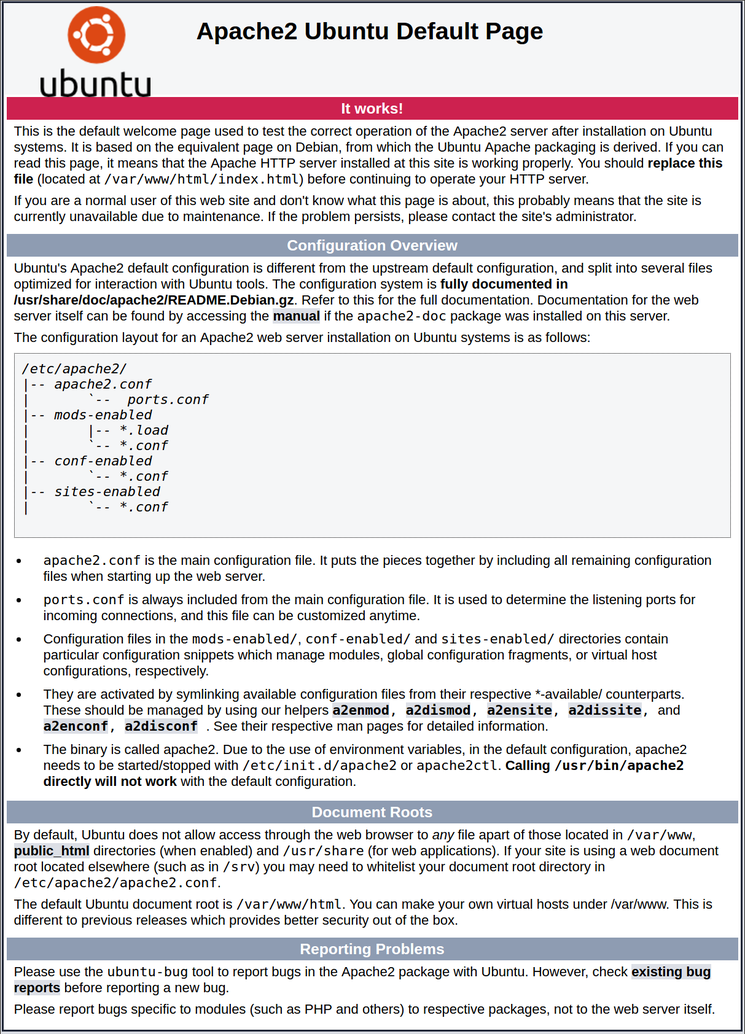
Jika sudah benar akan ada output seperti ini:
Managing Apache Process
Berikut ini merupakan beberapa perintah yang sering digunakan pada apache.
Stop apache web server
sudo systemctl stop apache2
Start apache web server
sudo systemctl start apache2
Restart apache web server
sudo systemctl restart apache2
Ketika ada perubahan config bisa menggunakan perintah ini tanpa mematikan apache
sudo systemctl reload apache2
Install MariaDB 10.4
Tambahkan MariaDB repository.
sudo apt install -y software-properties-common
sudo apt-key adv --recv-keys --keyserver hkp://keyserver.ubuntu.com:80 0xF1656F24C74CD1D8
sudo add-apt-repository 'deb [arch=amd64,arm64,ppc64el] http://mirror.lstn.net/mariadb/repo/10.4/ubuntu focal main'
Notes
Untuk Ubuntu 18.04 ganti kata focal pada baris ketiga perintah diatas dengan bionic.
Update package index dan install MariaDB.
sudo apt update
sudo apt install -y mariadb-server
Check MariaDB
Setelah installasi selesai MariaDB akan langsung berjalan. Untuk mengeceknya gunakan perintah ini.
systemctl status mysql
Jika belum berjalan, jalankan manual dengan perintah ini.
sudo systemctl start mariadb
Untuk menjalankan MariaDB ketika booting, gunakan perintah ini.
sudo systemctl enable mariadb
Cek versi MariaDB dengan menggunakan perintah ini.
mysql --version
Output nya kurang lebih seperti berikut.
mysql Ver 15.1 Distrib 10.4.21-MariaDB, for debian-linux-gnu (x86_64) using readline 5.2
Notes: Pastikan versi yang terinstall adalah 10.4.x.
Post Install Script
Setelah MariaDB sudah selesai di install dan dipastikan berjalan dengan baik, langkah selanjutnya adalah melakukan post installation step. Jalankan perintah berikut.
sudo mysql_secure_installation
Tekan enter untuk pertanyaan ini.
Enter current password for root (enter for none):
Masukkan huruf n kemudian tekan enter untuk pertanyaan ini.
Switch to unix_socket authentication [Y/n]
Masukkan huruf n kemudian tekan enter untuk pertanyaan ini.
Change the root password? [Y/n]
Tekan enter untuk pertanyaan ini.
Remove anonymous users? [Y/n]
Tekan enter untuk pertanyaan ini.
Disallow root login remotely? [Y/n]
Tekan enter untuk pertanyaan ini.
Remove test database and access to it? [Y/n]
Tekan enter untuk pertanyaan ini.
Reload privilege tables now? [Y/n]
NOTE: RUNNING ALL PARTS OF THIS SCRIPT IS RECOMMENDED FOR ALL MariaDB
      SERVERS IN PRODUCTION USE!  PLEASE READ EACH STEP CAREFULLY!

In order to log into MariaDB to secure it, we'll need the current
password for the root user. If you've just installed MariaDB, and
haven't set the root password yet, you should just press enter here.

Enter current password for root (enter for none):
OK, successfully used password, moving on...

Setting the root password or using the unix_socket ensures that nobody
can log into the MariaDB root user without the proper authorisation.

You already have your root account protected, so you can safely answer 'n'.

Switch to unix_socket authentication [Y/n] n
 ... skipping.

You already have your root account protected, so you can safely answer 'n'.

Change the root password? [Y/n] n
 ... skipping.

By default, a MariaDB installation has an anonymous user, allowing anyone
to log into MariaDB without having to have a user account created for
them.  This is intended only for testing, and to make the installation
go a bit smoother.  You should remove them before moving into a
production environment.

Remove anonymous users? [Y/n]
 ... Success!

Normally, root should only be allowed to connect from 'localhost'.  This
ensures that someone cannot guess at the root password from the network.

Disallow root login remotely? [Y/n]
 ... Success!

By default, MariaDB comes with a database named 'test' that anyone can
access.  This is also intended only for testing, and should be removed
before moving into a production environment.

Remove test database and access to it? [Y/n]
 - Dropping test database...
 ... Success!
 - Removing privileges on test database...
 ... Success!

Reloading the privilege tables will ensure that all changes made so far
will take effect immediately.

Reload privilege tables now? [Y/n]
 ... Success!

Cleaning up...

All done!  If you've completed all of the above steps, your MariaDB
installation should now be secure.

Thanks for using MariaDB!
Install php 7.3
Tambahkan php 7.3 repository
sudo add-apt-repository ppa:ondrej/php
Install php 7.3 menggunakan perintah ini.
sudo apt update
sudo apt install -y php7.3 php7.3-dev php-pear
Check php Version
Setelah installasi selesai, cek apakah php 7.3 sudah ter install dan berjalan dengan baik menggunakan perintah ini.
php -v
Output nya kurang lebih seperti ini.
PHP 7.3.31-1+ubuntu20.04.1+deb.sury.org+1 (cli) (built: Sep 23 2021 21:36:16) ( NTS )
Copyright (c) 1997-2018 The PHP Group
Zend Engine v3.3.31, Copyright (c) 1998-2018 Zend Technologies
    with Zend OPcache v7.3.31-1+ubuntu20.04.1+deb.sury.org+1, Copyright (c) 1999-2018, by Zend Technologies
Apabila yang terinstall php 8 dengan output kurang lebih seperti berikut.
PHP 8.0.11 (cli) (built: Sep 23 2021 21:26:24) ( NTS )
Copyright (c) The PHP Group
Zend Engine v4.0.11, Copyright (c) Zend Technologies
    with Zend OPcache v8.0.11, Copyright (c), by Zend Technologies
Gunakan perintah ini untuk mengganti ke php 7.3.
sudo a2enmod php7.3
sudo service apache2 restart
sudo update-alternatives --set php /usr/bin/php7.3
sudo update-alternatives --set phar /usr/bin/phar7.3
sudo update-alternatives --set phar.phar /usr/bin/phar.phar7.3
Install php Extension
Untuk install beberapa extension php sekaligus, gunakan perintah ini.
sudo apt install -y php7.3-curl php7.3-dom php7.3-gd php7.3-intl php7.3-mbstring php7.3-mysqli php7.3-xmlrpc php7.3-zip php7.3-json
Install Ioncube Loader Extension
Ada beberapa langkah untuk menginstall Ioncube Loader.
Notes
- Jalankan perintah dibawah ini menggunakan Command Prompt atau Terminal di local PC Anda.
- Ganti SERVER_CERT.pem dengan file certificate untuk login ke server yang dituju.
- Ganti IP_SERVER dengan IP Address server yang dituju.
- Extract file ioncube_loaders_lin_x86-64.zip (64Bit) atau ioncube_loaders_lin_x86.zip (32Bit).
- Copy
ioncube_loader_lin_7.3.soke server.
scp -i SERVER_CERT.pem ioncube_loader_lin_7.3.so ubuntu@IP_SERVER:/home/ubuntu/
- Masuk ke server melalui ssh
ssh -i SERVER_CERT.pem ubuntu@IP_SERVER
- Buat folder ioncube menggunakan perintah ini.
cd /usr/local
sudo mkdir ioncube
- Pindahkan file
ioncube_loader_lin_7.3.soke folder tersebut.
sudo mv /home/ubuntu/ioncube_loader_lin_7.3.so /usr/local/ioncube/
- Import extension tersebut ke
php.iniCLI.
sudo nano /etc/php/7.3/cli/php.ini
Masukkan baris berikut dibagian atas setelah [PHP].
[PHP]
zend_extension = /usr/local/ioncube/ioncube_loader_lin_7.3.so
Notes: Tekan ctrl + x kemudian y kemudian enter untuk menyimpan.
- Import extension tersebut ke
php.iniapache.
sudo nano /etc/php/7.3/apache2/php.ini
Masukkan baris berikut dibagian atas setelah [PHP].
[PHP]
zend_extension = /usr/local/ioncube/ioncube_loader_lin_7.3.so
Notes: Tekan ctrl + x kemudian y kemudian enter untuk menyimpan.
Install MSSQL Extension
Ada beberapa langkah untuk menginstall MSSQL extension.
- Tambahkan repository MSSQL
sudo su
curl https://packages.microsoft.com/keys/microsoft.asc | apt-key add -
curl https://packages.microsoft.com/config/ubuntu/20.04/prod.list > /etc/apt/sources.list.d/mssql-release.list
exit
sudo apt-get update
Notes
Untuk Ubuntu 18.04 ganti 20.04 pada baris ketiga perintah diatas dengan 18.04.
- Install Driver msodbc
sudo ACCEPT_EULA=Y apt install -y msodbcsql17
- Install Driver unixodbc
sudo apt install -y unixodbc-dev
- Install extension.
sudo pecl install sqlsrv
sudo pecl install pdo_sqlsrv
sudo su
printf "; priority=20\nextension=sqlsrv.so\n" > /etc/php/7.3/mods-available/sqlsrv.ini
printf "; priority=30\nextension=pdo_sqlsrv.so\n" > /etc/php/7.3/mods-available/pdo_sqlsrv.ini
exit
sudo phpenmod -v 7.3 -s cli sqlsrv pdo_sqlsrv
sudo phpenmod -v 7.3 -s apache2 sqlsrv pdo_sqlsrv
sudo systemctl reload apache2
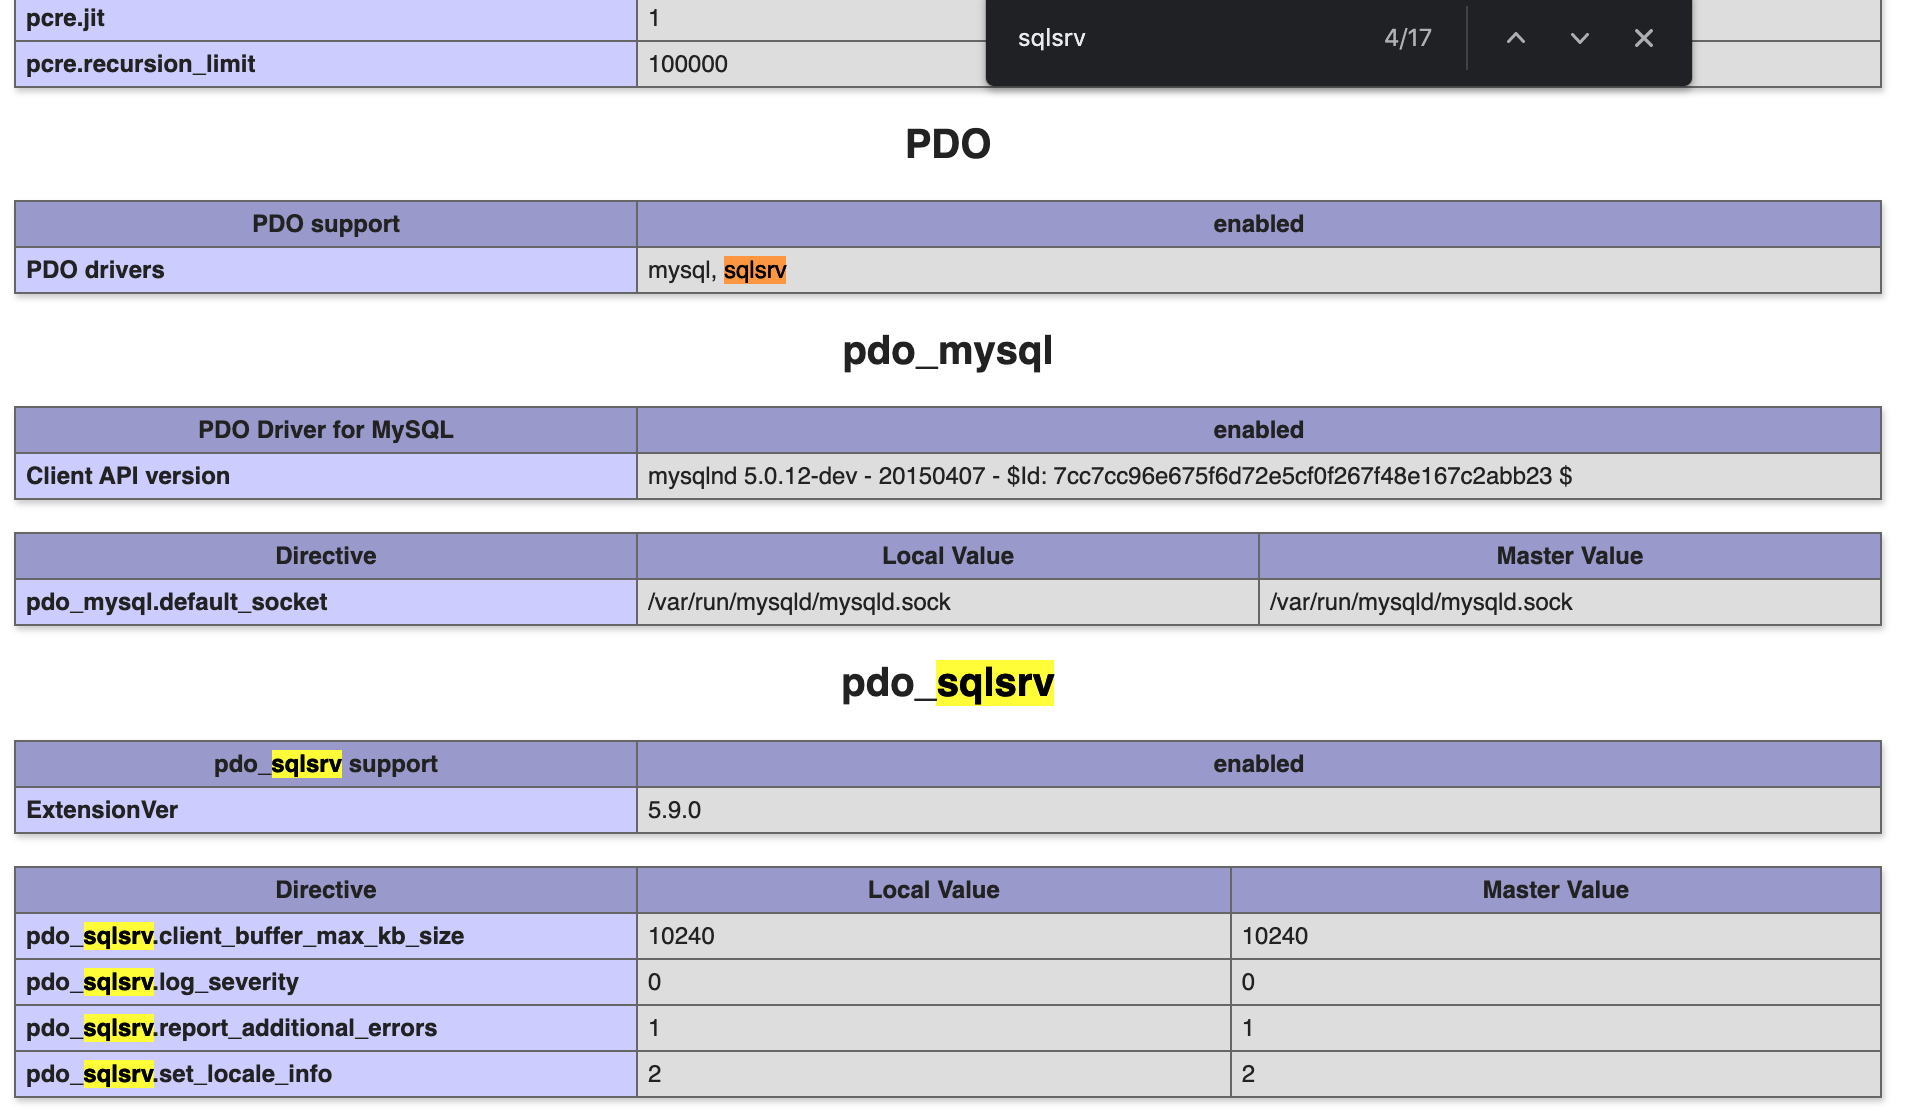
- Cek apakah Ioncube Loader dan SQL Server extension sudah ter install dan berjalan dengan baik menggunakan perintah berikut.
sudo su
echo "<?php phpinfo(); ?>" > /var/www/html/info.php
exit
Kemudian buka http://IP_SERVER/info.php dan cek apakah sudah ada extension tersebut. Output nya kurang lebih seperti berikut:

Install phpMyAdmin
Untuk menginstall phpMyAdmin, gunakan perintah berikut.
sudo apt install -y phpmyadmin
Post Installation
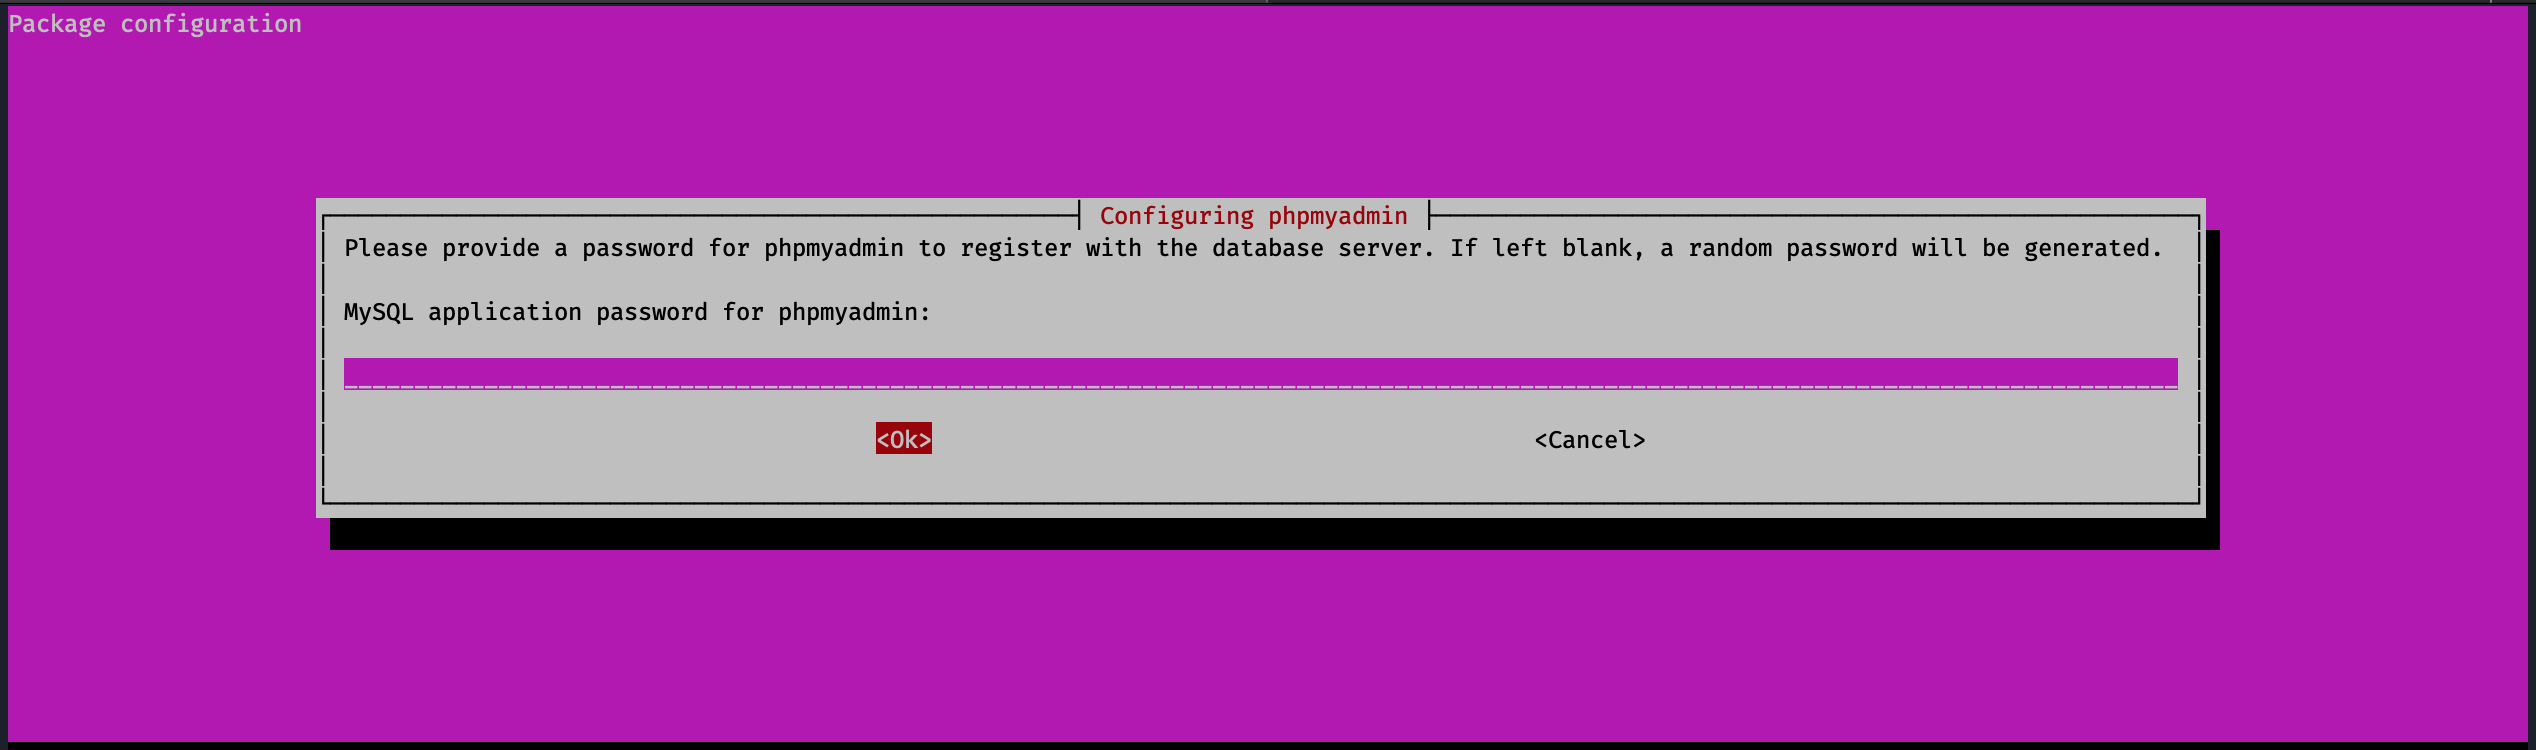
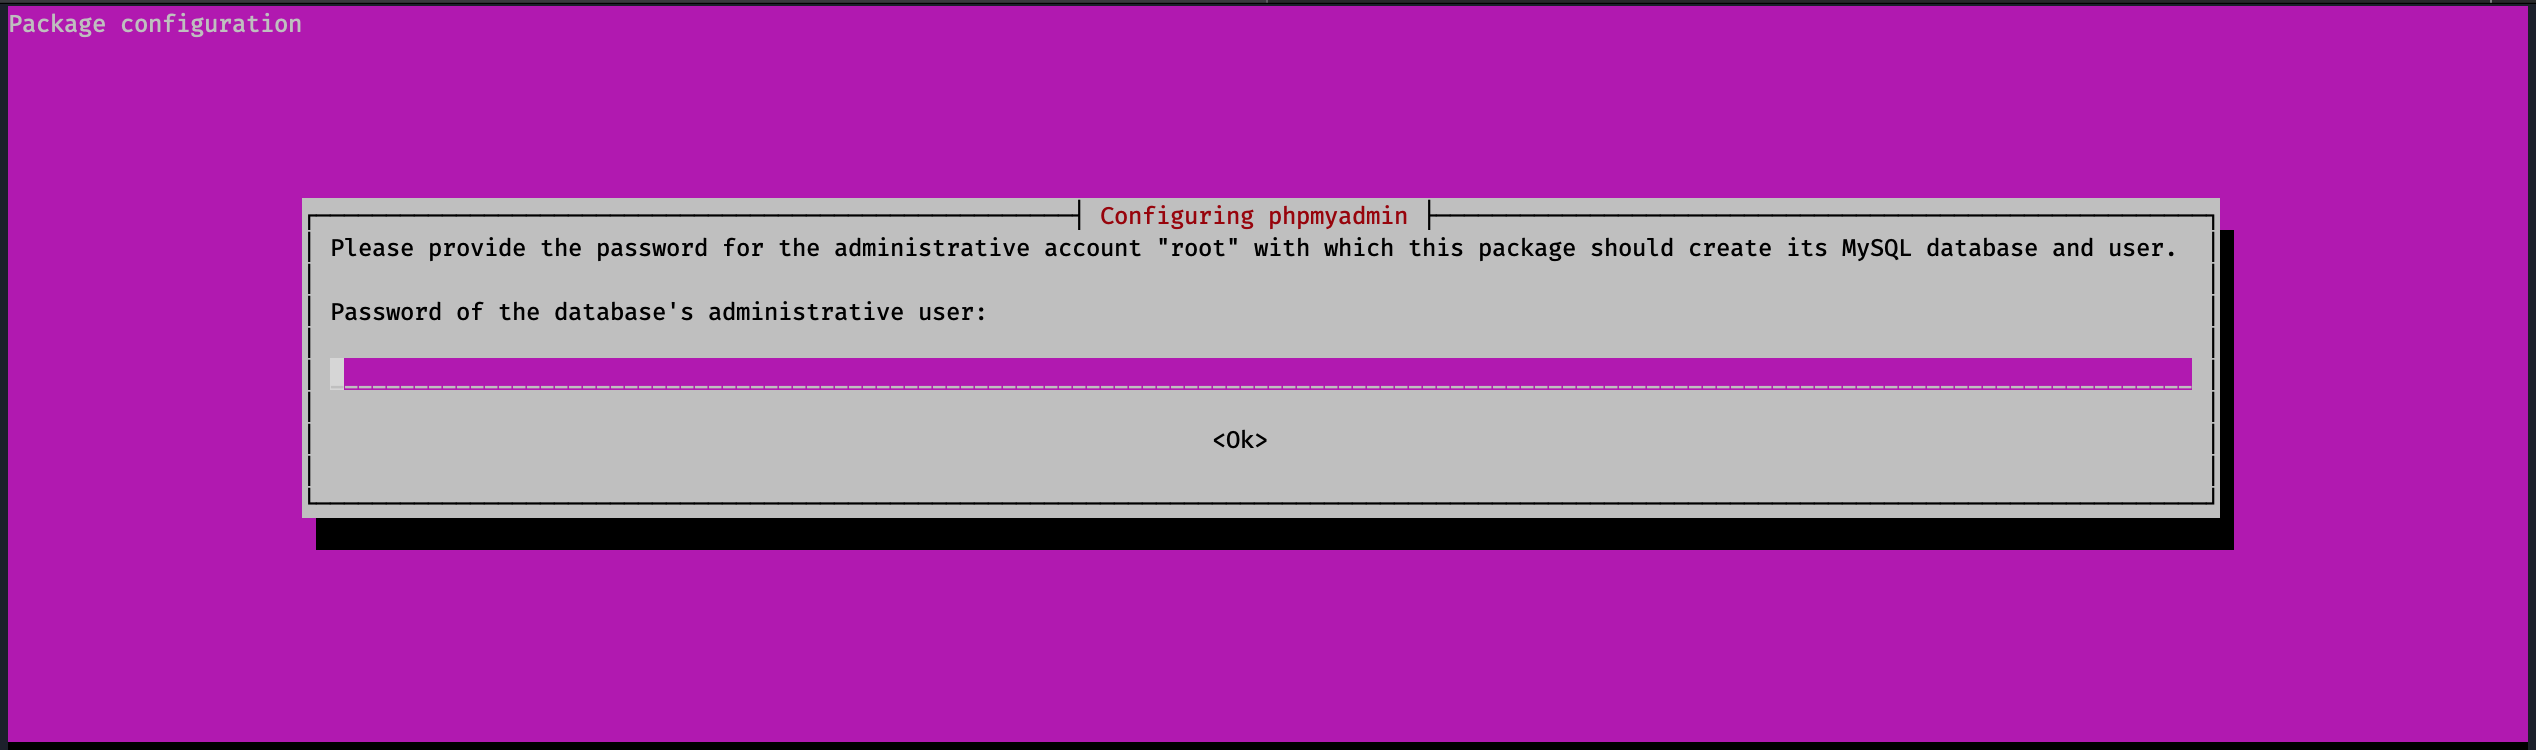
Akan ada beberapa pertanyaan setelah installasi phpMyAdmin selesai.
- Pilih
apache2sebagai server.
danger
Secara default apache2 hanya di highlight saja, Anda harus menekan SPASI untuk memilihnya. Kemudian tekan TAB dan ENTER untuk melanjutkan.

- Pilih YES untuk pertanyaan: Configure database for phpmyadmin with dbconfig-common?

- Tekan TAB kemudian ENTER untuk pertanyaan: MySQL application password for phpmyadmin: (tanpa mengisi password).
- Tekan TAB kemudian ENTER untuk pertanyaan: Password of the database's administrative user: (tanpa mengisi password).
Securing phpMyAdmin
Buka file berikut.
sudo nano /etc/apache2/conf-available/phpmyadmin.conf
- Tambahkan
AllowOverride Allpada section<Directory /usr/share/phpmyadmin>.
<Directory /usr/share/phpmyadmin>
    Options SymLinksIfOwnerMatch
    DirectoryIndex index.php
    AllowOverride All
    . . .
Tekan
ctrl + xkemudianykemudianenteruntuk menyimpan.Restart apache menggunakan perintah berikut.
sudo systemctl restart apache2
- Buat
htaccessuntuk phpMyAdmin menggunakan perintah berikut.
sudo nano /usr/share/phpmyadmin/.htaccess
- Masukkan baris berikut.
AuthType Basic
AuthName "Restricted Files"
AuthUserFile /etc/phpmyadmin/.htpasswd
Require valid-user
- Buat
htpasswdmenggunakan perintah berikut.
sudo htpasswd -c /etc/phpmyadmin/.htpasswd equal
- Masukkan password:
ksp123!@#
- Restart apache menggunakan perintah berikut.
sudo systemctl restart apache2
Register MySQL User
Masuk ke mysql menggunakan perintah berikut.
sudo mysql -u root
Masukkan query berikut.
CREATE USER IF NOT EXISTS 'sa'@'localhost' IDENTIFIED BY 'U6v1pPnVE513nz75'; GRANT USAGE ON *.* TO 'sa'@'localhost' REQUIRE NONE WITH MAX_QUERIES_PER_HOUR 0 MAX_CONNECTIONS_PER_HOUR 0 MAX_UPDATES_PER_HOUR 0 MAX_USER_CONNECTIONS 0; GRANT ALL PRIVILEGES ON api.* TO 'sa'@'localhost' WITH GRANT OPTION; GRANT ALL PRIVILEGES ON api_sync_log.* TO 'sa'@'localhost' WITH GRANT OPTION; FLUSH PRIVILEGES;
CREATE USER IF NOT EXISTS 'sa'@'%' IDENTIFIED BY 'U6v1pPnVE513nz75'; GRANT USAGE ON *.* TO 'sa'@'%' REQUIRE NONE WITH MAX_QUERIES_PER_HOUR 0 MAX_CONNECTIONS_PER_HOUR 0 MAX_UPDATES_PER_HOUR 0 MAX_USER_CONNECTIONS 0; GRANT ALL PRIVILEGES ON api.* TO 'sa'@'%' WITH GRANT OPTION; GRANT ALL PRIVILEGES ON api_sync_log.* TO 'sa'@'%' WITH GRANT OPTION; FLUSH PRIVILEGES;
Install supervisor (NEW)
supervisor digunakan untuk menjalankan queue dan notifikasi EQUAL di Ubuntu.
sudo apt install -y supervisor
Cek supervisor sudah berjalan menggunakan perintah:
sudo systemctl status supervisor
Output nya kurang lebih seperti ini.
● supervisor.service - Supervisor process control system for UNIX
     Loaded: loaded (/lib/systemd/system/supervisor.service; enabled; vendor preset: enabled)
     Active: active (running) since Sun 2022-01-23 16:08:24 WIB; 31s ago
       Docs: http://supervisord.org
   Main PID: 1433 (supervisord)
      Tasks: 1 (limit: 1071)
     Memory: 15.0M
     CGroup: /system.slice/supervisor.service
             └─1433 /usr/bin/python3 /usr/bin/supervisord -n -c /etc/supervisor/supervisord.conf

Jan 23 16:08:24 ubuntu systemd[1]: Started Supervisor process control system for UNIX.
Jan 23 16:08:25 ubuntu supervisord[1433]: 2022-01-23 16:08:25,551 CRIT Supervisor is running as root.  Privileges were not dropped because no user is specified in the config file.>
Jan 23 16:08:25 ubuntu supervisord[1433]: 2022-01-23 16:08:25,556 WARN No file matches via include "/etc/supervisor/conf.d/*.conf"
Jan 23 16:08:25 ubuntu supervisord[1433]: 2022-01-23 16:08:25,567 INFO RPC interface 'supervisor' initialized
Jan 23 16:08:25 ubuntu supervisord[1433]: 2022-01-23 16:08:25,568 CRIT Server 'unix_http_server' running without any HTTP authentication checking
Jan 23 16:08:25 ubuntu supervisord[1433]: 2022-01-23 16:08:25,568 INFO supervisord started with pid 1433
Install zip & unzip
Untuk menginstall zip dan unzip, gunakan perintah berikut:
sudo apt install -y zip unzip